A PRENATAL WORKOUT WITH MIRAFIT

‘You shouldn’t let your heart rate go over 140bpm’

‘You can’t do any work on your core’

‘You shouldn’t lift any weights over your head’

As a pre/post natal personal trainer, I would say that it’s less important to listen to these bits of outdated advice and more important to listen to your body and do what feels good. There are some clear things that you should aim to avoid while pregnant, including not lying on your back after 16 weeks for too long, rotating excessively through the core and anything that looks like a crunch, but there’s also plenty that you can do.

I’m now 17 weeks pregnant and I’ve got to say that I’ve been very lucky in that I’ve been able to continue working out three times a week bar a few weeks where I’ve been away or too busy with work. During my first pregnancy I was simply too tired and sore to workout and I’d just moved to a completely new area and didn’t find anywhere that I felt like I belonged or felt happy working out.

Fast forward to now and I’ve been working out at CrossFit St Albans for just over a year. It made sense for me to just continue working out like I have been when I got pregnant again, just with a few modifications.

Anyway, there’ll be more about doing CrossFit while pregnant in future posts. This post is about using some of the Mirafit equipment to do a variety of home workouts. I’m lucky enough to have a little gym space at home so I picked some equipment to review that I can do a lot with, the wooden plyo box, a set of 7.5kg dumbbells and a speed rope. All of the equipment is solid, well made and the box was relatively easy to put together. While I have a dedicated space, with a bit of rearranging you could use this equipment in your lounge, in your garden or anywhere where you’ve got a bit of space. You could even use the plyo box as a coffee table if you really wanted!


Workout 1 (suitable for trimesters 1 & 2):

8 x elevated press ups (hands on box, keep a straight line from your heels to your shoulders)

8 x goblet squats

8 x knee plank walks (place the skipping rope in front of you, start on all 4’s, walk your hands forwards keeping your hips stable, step your right hand forwards over the skipping rope, then step your left hand forwards to join it, step each hand back to the start position and repeat 8 times)

x 8 rounds


Workout 2 (suitable for trimesters 1 & 2):

20 minutes on the clock

12 x box step ups

8 x seated shoulder press (sit on the ground with your back against the box and your feet flat on the floor wherever feels comfortable, press the dumbbells up overhead and lower back down with control)

8 x box burpees


Workout 3 (suitable for trimester 1, 2 & 3):

6 x elevated press ups (hands on box)

6 x dumbbell deadlifts

6 x bird dogs

x 6 rounds


Things to bear in mind throughout any prenatal workouts:

- breathe out on the effort (eg. standing up from a squat) to avoid holding your breath and creating too much pressure within your mid-section

- listen to your body, if it doesn’t feel good then stop

- stick at a level of intensity where you could still maintain a conversation


All equipment was gifted by Mirafit but opinions are my own. Before exercising whilst pregnant please check with your antenatal caregiver that you are fit to exercise during pregnancy. If you experience any dizziness, bleeding or pain while exercising please consult your GP or midwife.

Perifit: The Pelvic Floor Trainer

I was gifted the Perifit for this review but all opinions are my own.

Pelvic floor, pelvic floor, pelvic floor. These are some of the words that you’ll hear the most just after you’ve had a baby and with good reason. To take it back to basics though, what is your pelvic floor? Your pelvic floor muscles act like a hammock to support the pelvic organs, including the bladder, uterus and rectum. FYI men also have pelvic floor muscles but for the sake of this post I’m talking about the female pelvic floor muscles.


Whether you’ve delivered your baby vaginally or via c-section, your pelvic floor undergoes a huge amount of stress during pregnancy, it’s not just the mode of delivery that can affect it. Towards the end of pregnancy you’ll have a fully-grown baby pressing down on your pelvic floor muscles with very little relief which can fatigue the muscles and overstretch them.


The result is that at the end of pregnancy and after birth these muscles can be weak and even non-functional directly after birth. One of the best pieces of advice that I was given when we were sat in hospital for four days after the birth of my son was to do my pelvic floor exercises every time he was feeding, which in those early days was an awful lot. Even still, there were a few mad dashes to the toilet before my pelvic floor muscles woke up and decided to work again a few days later.


However, it’s not just in the early days that it’s important to do your pelvic floor exercises because it’s an ongoing recovery and strengthening journey. Enter Perifit, the Kegel exerciser. While it looks like a sex toy it’s actually a sophisticated bit of kit that can help you to exercise your pelvic floor muscles.

How does it work?

You download the Perifit app and connect the device to it. Then you insert the Perifit with the antennae pointing out (this is how it connects to your phone via Bluetooth) and get ready to workout. There are a number of games you can play where you control the flying character by performing short squeezes and long, sustained squeezes with your pelvic floor.


How big is it?

The part of the device that is meant to be inserted is 3.1 inches / 8.3 cm long, and the diameter is up to 0.8 inches / 2.8 cm

Is it comfortable?

Once it’s inserted it’s fine, they do suggest that you use a lubricant to insert it if needed


When can you use it?

There’s no instructions as to when you can use it but I would recommend waiting until your post-partum bleeding has stopped because you don’t want to introduce anything that could cause an infection. If you gave birth a while ago or have never given birth you can still use it because pelvic floor strength is something that needs to be worked at on an ongoing basis.


Does it work?

It really helped me to zero in on my pelvic floor muscles and activate them properly because if you don’t use them correctly then the device can slide out and you don’t hit any of the targets in the games because the device isn’t picking up the correct muscle movements internally. My pelvic floor muscles have definitely got stronger but I’ve been using the Perifit in conjunction with pelvic floor exercises multiple times a day whenever I remember and working on my core and deep abdominals in the gym


What are the cons?

I found it difficult to find time to use it because I found it easiest to concentrate when there wasn’t anyone around and as a new mum that’s tricky enough. You have to actively set aside time to go upstairs and use it which I was able to do probably once or twice every two weeks


How much does it cost and where can I get one?

It is currently on sale for £106 and you can buy one here


Any final thoughts?

I would recommend the Perifit if you’re struggling to connect with your pelvic floor and I would see it being used as one tool in the toolbox to improve your pelvic floor health alongside regular pelvic floor exercises and core activation. Remember, doing a wee when jumping after having a baby is not just something you have to put up with! If you have any concerns then the best thing to do is to visit a Women’s Health Physio who can do a full assessment.


SLEEP LIKE AN EXCEPTIONAL ATHLETE

This post is in conjunction with TEMPUR® but all thoughts are my own.

Anyone who knows me will know that my bed is probably my favourite place on earth and sleeping is of the utmost importance to me. I find that the sweet spot is around 8 hours per night for me, particularly as I’m a light sleeper and I’m very unlikely to sleep solidly through the night.

This optimum sleep time will increase or decrease depending on the level of physical activity that I’m doing at any given time and I definitely notice my physical performance taking a hit if I don’t sleep well as my muscles don’t repair themselves fully. But what do the professionals have to say about sleep and its relation to athletic performance?

One of my idols is Serena Williams (did I ever tell you about the time I played tennis with her?) and she has been sleeping on a Tempur mattress for the last 10 years. She credits the mattress and pillows for relieving pressure points while she sleeps allowing her to get up and hit the court in top condition. More recently she has been loving her mattress to increase her sleep during pregnancy as she went from around 5 hours per night up to around 8.

Cheri Mah of the Stanford Sleep Disorders Clinic and Research Laboratory authored a study in 2009 that followed the Stanford University women’s tennis team as they attempted to get 10 hours of sleep every night for 5 weeks. She found that they sprinted faster and hit a higher number of accurate shots than when they were getting their normal amount of sleep.

The one aspect that comes up over and over again is how athletes at the top of their game are prioritising sleep in their training schedules. Simone Biles, Roger Federer and Michael Phelps all look at their sleep in the run up to big competitions and make sure that they are achieving the optimum amount of sleep for them and their bodies. This even goes as far as readjusting their sleep patterns well in advance of competing abroad to align their times of being awake with the competition times.

So although it’s shown that one bad night’s sleep won’t hugely affect your athletic ability, it’s clear that consistently appropriate amounts of sleep for you and your body will keep you performing at the top of your game. How does that apply to those of us who aren’t olympic athletes though?


Here are my top tips on how to get the most out of your night’s sleep:

1) Have a set bedtime routine: I can’t go to bed without having a shower, no matter how late it is or how tired I am. That shower is the signal to my body to start slowing down and I’m typically asleep within half an hour of getting out of the shower.

2) Limit screen time: We live in a hyper-connected world and sometimes it’s difficult to switch off, literally and figuratively. Try reading before bed to limit the amount of blue light shining in your eyes and to slowly switch off your brain.

3) Essential oils: Recently I’ve been putting lavender oil into my humidifier at night and it’s helping me to drift off to a familiar smell each night. Alternatively you can buy pillow mists or even just keep a bag of dried lavender next to your bed and give it a scrunch each night as you get into bed.

4) Write out your to-do list: Every night I try to write out my urgent to-do list for the following day so that I don’t wake up at 3am panicking that I’ve forgotten something. It means that I can get up with a clear head and attack each day from the start.

5) Don’t be afraid to reset: If you do wake up in the night, which I do nearly every night, I find it useful to get out of bed and reset my brain rather than stressing about the fact that I’m awake. That could include going to the loo, getting a glass of water or reading a book for a little while.


My sleep patterns have been getting increasingly erratic as I progress through this pregnancy to the point where, at 8.5 months pregnant, I now sleep in about 45 minute bursts, punctuated with all sorts of pain in my back and hips, acid reflux and countless trips to the loo. With only a couple of weeks left until we get to meet our little one I’m trying to think ahead to when I start working out again and how I can optimise my sleep with a baby.

Tired eyes, bed hair, stretch marks and the bump

Serena Williams prioritised her sleep after the birth of her daughter and she says that’s how she was able to make it to yet another Wimbledon final a mere 10 months after giving birth. While I’m not aiming to make it to Centre Court, I will be taking her tips on trying to get as much sleep as possible to let the body recover and work at an athletic level again. Watch this space!


3 INGREDIENT BANANA FLAPJACK RECIPE

Ok, I’m not going to lie, this isn’t really a recipe because there is no skill involved in it at all but they taste delicious and I’m rubbish at baking so there we go.

At the moment I’m all about convenience food because my interest in cooking has completely gone out of the window along with my desire to eat meat, cooked vegetables or basically anything that isn’t a carb. Therefore, having some delicious snacks in the kitchen that contain at least some micronutrients is a bonus in my book.

This is where these easy flapjacks come in. They were inspired by having a large number of bananas that had gone past the point of decency with their ripeness. I made 3 of them into a sugar and butter-laden banana bread (which was perfectly delicious) but the rest of them became these flapjacks so that I could eat them mid-afternoon without getting a massive sugar buzz and crash.


Ingredients:

3 x very ripe bananas

1.5 cups oats

1 large tablespoon crunchy peanut butter


Method:

- Mash the bananas in a bowl

- Mix in the oats and peanut butter until fully combined

- Shape into 12 vaguely round shapes

- Bake at 180 degrees (fan) for 15 minutes until they’re a little bit crispy on top but not burnt

- Store in an airtight container for up to 5 days (if they last that long)


These are high in carbohydrates so they’d be perfect to eat around your workouts as an energy boost or to replenish the glycogen in your muscles after a heavy session if that’s what you’re into. Alternatively, just eat one whenever your peckish. They would be great as fuel on a long run or cycle because those gels do get tiresome after a while and can play havoc with your digestion if you take too many. I’ve also discovered that dogs love them so if you’re making them for your furry friend then just make sure that you use a peanut butter that is 100% nuts and doesn’t contain any xylitol which is poisonous to dogs.


You could add in a number of things too including:

- cinnamon

- chocolate chips

- raisins or dried cranberries

- matcha powder for a caffeine boost


Give them a go!

THE UPS AND DOWNS OF MY FIRST TRIMESTER

I’m starting a series on this blog based around my own experiences as an expectant mum (HOW GROWN UP) and as a pre-& post-natal qualified personal trainer.

This first post is more about my own experiences in the first trimester but coming up are my tips on how to exercise in your first 3 months of pregnancy as well as some workouts you can do yourself.

With all the early pregnancy tests that are about now, women are finding out earlier and earlier that they’re pregnant which isn’t necessarily a good thing as it can prolong the first trimester worrying. I found out I was pregnant about 10 days before my period was due which meant that I couldn’t relax until I was over that first mini obstacle of actually missing a period.

Unfortunately I’d had a devastating miscarriage towards the end of last year which started a few days after my missed period so once I got past that point with this pregnancy I definitely breathed a big sigh of relief.

Weeks 4 -6 were a doddle to be honest, I was just ravenously hungry 24 hours a day and bursting with this big secret that I was sharing with just the hubby. I had to have pre-lunch sandwiches as well as constant snacks but apart from that I felt pretty good. I was just about managing to keep up my exercise schedule with 2-3 sessions each week plus a swim and some lengthy dog walks. I did notice that my bedtime was creeping earlier and earlier (which was great because bed = life). At the end of week 6 we had an early scan to put my mind at rest after the miscarriage. There is nothing quite as life-changing as seeing a little heartbeat on the screen and knowing that it’s growing inside your body. There were many tears from both of us.

The day that I turned 7 weeks was when it all went a bit tits up. For 2 weeks I could hardly eat as I felt horribly sick all day everyday. Any food that I thought I might have fancied turned my stomach after a few bites so I survived on water, melon and plain tortilla chips. A delightful side-effect of pregnancy is the incessant bloating, even when your stomach is completely empty. Needless to say exercise was very limited to Pip’s local daily walk and that took everything out of me. Along with daily naps I was in bed asleep by 8:30pm every night and sleeping solidly until 7am the following morning.


At 9 weeks, having lost half a stone in weight, with the help of some Sea Band acupressure bracelets I started to come round and began to eat again which was a welcome boost of energy. However, my taste buds have changed and food is still a bit of a constant battle. Here’s a current list of everything that I’ve gone off that I previously loved:

Chocolate

Ice cream

Anything with onions in

Gravy

Red meat

Green vegetables, particularly broccoli


In week 10 I started some early morning shifts at the local gym which meant getting up at 5:15am a few mornings a week. Needless to say, by 1pm I was often asleep on the sofa and still going to bed at 8pm. First trimester exhaustion is like no other tiredness I’ve ever experienced (yet. I know when the little one arrives it’ll be on another level). I did manage to start working out again which felt brilliant. However, I limited it to some light weights and plenty of stretching and pelvic floor & core strengthening. Whilst you can continue exercising as you used to during your early pregnancy, I hadn’t worked out in over a month so I didn’t want to cripple myself straight away. Also, my heart rate increased much quicker than normal during a workout so I kept my rest periods long and weights light.

Weeks 11 and 12 continued in much the same way, sometimes feeling nauseous, sometimes being ravenously hungry but always being exhausted. My 12 week scan however was a huge high point as we got to see the little bubba doing somersaults and waving at us. Obviously, there were a lot more tears.

So all in all, the first trimester has been a bit up and down and my body is slowly starting to feel like it doesn’t belong to me anymore (I’m looking at you boobs, why couldn’t you have grown like this when I was a teenager?!). Now that I’m nearly at week 15 my energy is coming back in fits and starts so I’ve started to work out again but I’m being sensible and listening to my body.

Despite the moaning, I feel incredibly lucky and privileged to be able to go through this journey as I know many women can’t who want to. I also know how life-changing a miscarriage can be and how no one really speaks about their experiences of it until you mention that you’ve gone through it.

The little bean that I lost will always be in my heart. If you’ve been through or are going through something similar and want to talk to someone then please feel free to reach out to me. It really helped me to talk to people who’d been through the same experience as I felt that they understood so thank you to everyone who listened to me through that tough time and shared their own heart-breaking stories with me.


GYM HOPPING WITH ESQUARED

There’s plenty of articles floating around at the moment about what people think the 2018 fitness trends are going to be but from what I can see, I think it’s going to be all about convenience.

As fitness has become mainstream (everyone and their nan knows what a burpee is), convenience is the name of the game. People like to be able to fit a workout into their day whether they’re working, chilling out, travelling or staying with friends. With a traditional gym membership this kind of working out isn’t possible and with a lot of the other options on the market, it’s only possible to go to classes. But what happens if it’s leg day and you need to get under that barbell and squat?!

Well, there’s options like PayAsUGym but I tried one out called Esquared. It’s an app that you top up with credit to spend at gyms. You can book into any classes that the gyms offer or you can book a slot on the gym floor to do your own workout.


The app, once downloaded, is easy enough to use although there’s a lot of options for central London so you need to zoom right into the map to get any visibility of what’s around you. At the moment it’s largely based in zones 1-2 in London. The closest gym floor slot to where I live now in Hertfordshire is about 8 miles away, a perfect distance on the bike to get my cardio in too!

I tried the app out by booking into Energie Fitness in Bethnal Green just before Christmas and before I moved house. It just takes a couple of clicks to book your session once you’re topped up with credit. When I turned up the guy at reception was clued up on the app, buzzed us through the gate and gave us a short tour of the gym. Once we’d warmed up I put together a 25 minute circuit with all the fun equipment they had there and finished with a good stretch. That 2-hour session cost £8 worth of credit, much cheaper than a lot of day passes for gyms.


Would I use Esquared past the trial? Well, the short answer is yes but probably not as the sole provider of my fitness access. As I mentioned at the beginning of the post, I think convenience is important so I would combine Esquared with something like the 5 class option on Classpass, especially as the credit on Esquared doesn’t seem to expire. I’d also be more likely to use it if they extended their reach out beyond London.

Have you tried out something similar to Esquared? What did you think?


I was paid for my time to write this blogpost & provided with credit on Esquared but all opinions are my own

ALL ABOUT F45

There’s something about getting to the end of a tough class and feeling the vibe in the room where everyone is half amazed that they got through the class and half absolutely loving it. Know what I’m talking about? Then you must have been to F45.

I tried out a class at F45 Farringdon, a small space in a basement close to Farringdon Station that has a large studio, bright reception area and small but well-stocked changing rooms. The welcome that I got at 07:30 in the morning before the Panthers class was friendly and set me up perfectly for the class.

Panthers consists of 14 stations with a mix of cardio and strength exercises including burpees, chest press and deadlifts. One of the things that sets F45 apart from other studios is how accessible it is because all of the exercises are shown on screens around the room as well as the work and rest periods (60 seconds of work and 20 seconds of rest for this particular class).

There were two instructors in the room who were running around making sure that everyone’s technique was on point which was the best attention I’ve ever seen in a large class format. Once one of the instructors knew about my lower back issues he kept coming over and suggesting ways that I could modify certain exercises. He also spotted me when I got a bit cocky on the chest press and helped me push through to the end of the work period.

For me, as a personal trainer and group exercise instructor, one of the hardest things when I’m teaching a big group is how tricky it is to make sure everyone is doing the exercise correctly and not putting themselves at risk of injury. In other studios I’ve seen participants doing things that make me wince but because the instructor has so many other people to watch (or because the studio is so dark…) they often miss technique cues. At F45 the focus is not on putting people in a dark room with flashing lights and giving them the transcendental experience like other studios, it’s just about giving people a bloody good workout and looking after their bodies.

Overall it’s one of the best classes I’ve been to because of the mix of strength and cardio exercises, the accessibility and the personal attention that the instructors gave to all of the participants. I’m just gutted that after that first class I became ill and couldn’t use the rest of my two week trial! There are F45 studios all over London with two new ones opening up in Old Street and Stratford any day now. You can get your own 2-week trial on their website, I’d highly recommend giving it a go and let me know how you get on.

5 TOP TIPS WHEN YOU’RE STRUGGLING IN A RACE

You know that moment in a race where you want to cry, stamp your feet and throw a strop because you can’t possibly continue even another inch? Everything hurts and you’re tired (and possibly hungry) and the finish line is SO FAR AWAY.

Well, I had that for the first time in a long time during l’Etape London, a 49 mile cycle event that I did a few weeks ago. The background of this event is that I did it in it’s inaugural year, 3 years ago, and loved every gloriously sunny second of it. I flew round, indulged in salty potatoes at the feed station and only bonked hard once. I also knew nothing about fuelling and was coming off the back of a triathlon season that included lots of cycle training and generally higher levels of cardiovascular fitness.

When the opportunity arose to take part again in the event I jumped at the chance. It came a gentle 9 weeks after our epic cycling trip from London to Paris (you can read about that here) so I thought ‘great, my residual fitness will carry me over as well as regular training rides every weekend’. In reality, life and a health blip got in the way and I hadn’t cycled properly in about a month by the time l’Etape London came round. Whoops.

Luckily I was doing it with two other friends who are both badass cyclists and I knew I’d be able to make it. I just didn’t know how close to not making it I would get.

The event itself was relatively well-organised. The race village at the Olympic Park Velodrome was bigger than last time with some tasty-looking food trucks, a huge water tank for refills and various other brands who had some cool kit on show. We were registered for the Cycletta wave, a women’s only wave, which when it came down to it consisted of 6 women. Yep, 6 women. Apparently a lot of the Cycletta wave had gone off with earlier waves to cycle with their male friends which kind of defeats the point. I know once you’re out on the course it doesn’t matter so much but we did see those 3 other women out on the course and it felt good knowing that we were kind of like a little team. Next year, they either need to cut that wave altogether or publicise it more so it becomes more special.

The first 30 miles of the race flew by, mostly because Elle and I were nattering away the whole time as we had a lot to catch up on. The hills that forced me to walk last time seemed much more insignificant this time for both of us and although they were tough they weren’t world-endingly tough. The course volunteers were (in the most part) really helpful and they cheered us on the whole way.

It was after the (delicious) feed station that things started to unravel. My legs felt heavy, my hips and glutes hurt and I could feel the tell-tale start of chafe on my undercarriage. From that point it was a slog to the end of the course. 20 miles of slog. To put that into perspective, that’s about 2.5 hours of struggling.

Elle kept pushing me and we took it in turns to go in front and lead the pace. Her constant support and energy kept me going despite wanting to stop with every fibre of my body. With about 3 miles to go she zoomed off for a strong finish and I tried to follow suit. It didn’t really happen but I did get across that finish line in one piece. Just.


So here are my top tips on getting through a race when you’re struggling:

1) The world isn’t ending

This is something that I always have to remind myself. There was life before this struggle and there will be life after it and looking back on it, it’s never as bad as you think it is in the moment

2) Take your mind off it

Most of the struggle in these situations is mental. I mean, yes it hurts physically, but it’s your brain that wants you to give in to the pain and quit. So do what I do and think your pain away. My favourite game to play is daydreaming about what I would do if I won the lottery. Honestly, before you know it you’ve spent millions of pounds and you’re another 30 minutes down the road

3) Remind yourself you’ve done it before

If you haven’t actually done the exact race before, you’ve definitely hit tough moments in training and pushed through them. You’ve done it once, you can do it again

4) Think about crossing the line

This works for me every time. The draw of adding another medal to my lineup really helps to keep me moving forward. If you don’t finish, you don’t get a medal and if you don’t get a medal then what are you going to post on Instagram that evening?

5) Set mini goals

One of my favourite games to play in the closing stages of a race is to pick out individuals and make it my mission to overtake them. If they overtake you then you have to work harder to get back in front. Yes, it’s petty but my god it keeps you moving


Of course, all of these tips are to be used within reason. If you’re injured (including dangerous levels of dehydration) then my advice would be to stop, seek medical attention and come back next year for that medal. It’ll still be there.


Thank you to Human Race for giving me a space in l’Etape London in return for this review. All opinions are my own

AUTUMN KIT LUST LIST

The mornings are getting chillier and the nights are getting earlier, it can only mean one thing… Autumn is coming!

In preparation for the colder weather I’ve put together my Autumn kit list with all of my favourite layering options.

This is also a lust list so I don’t have everything on this list (obviously)


1) Sweaty Betty Power Leggings £75.00

I love the print on these and from what I’ve heard they are brilliant for pretty much everything, including wearing to brunch! Definite lust item

2) Tenn Outdoor sports bra £19.99

One of my friends, Becca posted a photo the other day in this kit and I had to include it in the list, I like the bright colour. Also, it’s affordable and I kind of love how it would clash with the Sweaty Betty leggings in a good way

3) Hunkemöller HKMX Blogger Caro_E_ The All Star L2 Sport Bra £30

This isn’t my usual style of sports bra but when I wore it I definitely felt like I had more shape! My normal sports bras tend to flatten everything whereas this one is padded with cups. It felt secure although the sizes seem to run a bit big. I ordered my normal bra size and it felt a bit too roomy around the band and through the cups. It looks great though so order a size down and you’ll be the envy of the gym

4) Endurance Conspiracy Tequila t-shirt £22

It’s not always all about lycra in my life and these t-shirts from Endurance Conspiracy are the perfect bridge from sportswear to leisurewear. I have 3 of them in different designs, all in a men’s size small. They’re great for chilling out in after a long cycle, pairing with jeans for a dressed-down look or dressing up with a skirt and some red lipstick

5) New Look Blue Ombre Print Sports Vest £6.00 (in sale right now!)

While I’m normally about plainer colours for leggings (apart from the Sweaty Betty ones above), I definitely like to go bright on top and this ombre top is perfect (and cheap!).

6) Nike Sportswear Tech Fleece £89.95

I’ve been lusting after a Nike tech fleece since they brought them out and this colour way is excellent. It’s simple, clean and totally my colours. It’s also a good one for those in-between days where it’s too warm for a jacket and too cold for just a t-shirt. Definite lust item

6) GapFit ColdControl aerofast puffer hoodie £64.95

I bought this last year in a different colour way and it’s been my absolute saviour. It’s so light to wear but seems to keep you as warm as you need it to. Even in these transitory weeks when the weather can’t make up its mind, you don’t overheat when wearing it. It’s also light enough to tie round your waist or stuff into a bag if you do hit a patch of sunshine

What’s on your Autumn kit lust list?

TOP 10 TIPS TO CYCLE FROM LONDON TO PARIS

Cycling from London to Paris was a massive learning curve for me because I’d never done any long-distance cycling before, let alone any kind of long-distance endurance event. So for those of you looking to take the challenge on here are my top 10 tips that I learned along the way.

1) Practice packing and carry your bags on training rides

I ended up strapping my backpack onto a luggage rack over my back wheel using bungee cords and the full bag added on considerable weight. It changed the handling of my bike and made going uphill considerably more hard-going, especially on the first day while my legs got used to it. I trained with a half-full bag which in hindsight was a bit pointless

2) Train with your buddies

Cycling as part of a group can be tricky and the more you can practice the easier it will be on the day. Learn and get used to all of the hand signals that you can use to indicate potholes, broken glass, parked cars and traffic lights to the riders behind you. By pointing these things out you’ll make it a safer ride for everyone

3) Decide on lunch stops and dinner locations in advance

We ended up having lengthy discussions most nights about where we were going to eat while we all got increasingly hangry. We managed to all stay friends but if you want to protect your friendships I’d highly recommend doing the research before you leave and agree on places in advance

4) Take it in turns to go at the front

For all of us there were moments where our bodies and/or minds wanted to give up and at these points drafting really came into its own. Drafting is when you tuck into the slipstream of the cyclist in front and it allows you to put in less effort because there’s less air resistance. However, if one person is always in front they will quickly get exhausted so take it in turns

5) Pack as little as possibly

Remember, halfway up a hill your 6kg bag will suddenly feel about 20kg so pack the bare minimum. Everyone will smell by day 3 so just embrace it and stop apologising. You can check out my packing list here and I can say that I packed light and used every single thing that I took

6) Stretch, stretch, stretch

Everything will hurt so take every opportunity you can to stretch out whatever feels tight. My back, bum and quads ended up feeling particularly tight so I tried to give them a good stretch each morning, evening and at rest stops

IMG_9996

7) Pack plenty of snacks

Not all french villages have a shop and the ones that do sometimes close at odd times so make sure that you’ve always got enough fuel with you to keep you going to the next village. My favourite bits of fuel were haribo fizzy cola bottles and the peanut butter and jam sandwich that I carried with me on the first day

8) Remember that after the Eiffel Tower you have to get back on your bike

We went straight to the Gare du Nord after the Eiffel Tower to drop our bikes at EuroDespatch to be taken back to London and this was another 5.5 miles across Paris which none of us had really thought about. Plan in your route and stay mentally ready for more cycling

9) Keep hydrating

While we’re all pretty good at hydrating on the bike, it’s worth remembering that you need to keep up with the electrolytes throughout the evenings and the day after your ride too. As tempting as it is to have some alcohol also bear in mind that it can be dehydrating so drink plenty of water on the side to avoid having to cycle on a hangover the next morning

10) The recovery will be tough

I’ve never known exhaustion like when I returned home from Paris. Everyday that week I had to nap in the afternoon and the idea of getting back on my bike or even doing any exercise was nearly enough to make me cry. But you will get back there and you will get back on your bike because it wasn’t actually that bad. Was it?


What tips would you add to the list?

CYCLING LONDON TO PARIS

Here it is, the post you’ve all been waiting for, my round-up of how I got from London to Paris on two wheels. To get up to date you can have a read of how training went here, a list of all the kit I took here and my nutrition plan for the ride here.


Day 1

Stratford, London -> Dieppe

73.5 miles

4,042ft elevation

Pain-factor: 4/10

We met bright and early at the Velodrome at the Olympic Park in Stratford because that’s where all our training rides had started and ended and it felt right that the real thing started from there too. By 06:45 we were on the road with very little fanfare and by 08:30 we were heading out of London towards the south coast (with a 45 minute stop for a pesky puncture/coffee/wees in Clapham).

All smiles before we set off from Stratford

The weather was perfect for cycling with gorgeous sunshine, a lovely breeze and the most beautiful views as we pedalled through the Surrey and Sussex countryside. We’d cycled from London to Brighton a few weeks before to recce the route and see what was ahead of us. That practice ride was one of the hardest we did in training as I felt nauseous the whole way and ended up walking up nearly every hill trying not to vom into the hedges. In complete contrast our ride on the actual day felt much easier and nearly pleasant.

Taking in the Sussex countryside

I managed to cycle up every single hill (with a couple of stops to catch my breath and let the lactic acid out of my legs) which gave me such a confidence boost. The peanut butter and jam sandwich that I’d packed to eat at the top of Turners Hill (if you know, you know) really helped to keep me moving too. Before we knew it we were approaching Newhaven in plenty of time. The ferry was booked for 17:30 and we made it to the port by 14:30, leaving us time to gorge on burgers and chips before locking our bikes up on the ferry and claiming a table next to the bar.

A couple of beers down and my stomach started to rebel. By the time we got off the ferry I was so bloated that all I wanted to do was curl up in bed but we still had a couple of miles to ride to the hotel, all uphill. We put our heads down and trudged up the hill before showering and collapsing in bed. Day one, done.

Feeling very bloody happy that day one was done


Day 2

Dieppe -> Beauvais

66 miles

1,525ft elevation

Pain factor: 6.5/10

Day 2 started with a massive breakfast buffet consisting of all the pastries, plenty of nutella and fresh French baguettes. We made some nutella sandwiches to take on the road and set off by 09:30. Overshare warning: I ended up being on my period by this point and all I’m going to say about that is THE CHAFING, THINK OF THE CHAFING. Ugh.

The first 3 hours of day 2 were along the Avenue Verte, a paved ex-railway that carved its way through the French countryside in a very straight line. We’d been looking forward to this as a car-free cycle path and it did end up being that but it felt tough from the first metre. We only realised when we stopped for lunch that those first 30 miles had been steadily uphill, sapping our legs of all energy without us being aware that we were actually climbing. There’s nothing like a sneaky hill to destroy all confidence in your cycling ability.

Travelling at warp speed (not)

Travelling at warp speed (not)

After a lunch of croque madames and chips we were back on the road to some rolling hills along the French roads. In general the French drivers were much more courteous than the English ones, passing us with plenty of room. One even stopped to check we were ok when I was lying on the ground by the side of the road trying to stretch out my back. He thought I was dead… Luckily I wasn’t. At this point we had a few more mechanical problems with a couple of the bikes so the mood was a little low. I put on some music on my phone which was easy to do as it was right in front of me thanks to my Quadlock.

Grooving away on the bike

Eventually we turned off the roads onto the Trans’Oise, another car-free cycle path, and everyone put their own music on. To this point we’d be cruising at around 12mph but as soon as the music hit us our speed went up to 15mph as we all thought we were in a spin class. In fact, there was so much dancing going on on the bikes that my triceps were sore the next day. We flew along the final 20 miles and made it to Beauvais and bed, after stuffing our faces with sushi. Day two, done.

Multitasking - checking Instagram whilst stretching

Multitasking - checking Instagram whilst stretching


Day 3

Beauvais -> Paris

51 miles

2,444ft elevation

Pain factor: 9/10

Getting back on the bikes in the morning of the third day was painful. My quads were really tight, my wrists were sore from the pressure on the handlebars, my fingers were numb and my lady bits were chafed and sore. You can see where this day 3 round-up is going.

From the start I struggled. We hit a hill pretty early on, at around mile 10, and I pushed my way up it, refusing to walk even an inch. Once we’d conquered that hill my quads seemed to ease a bit and for the next 20 miles we cruised along. If I’m totally honest, a lot of day 3 has become a blur of stopping to stretch, shaking out my hands and ramming food down my throat to keep my body fuelled. All I wanted to do was arrive in Paris and not have to get back on my bike again.

The final 20 miles or so, we cycled through increasingly bigger towns as we approached Paris so even the cycling itself wasn’t fun. As we hit the outskirts of Paris we had to deal with the French taxi drivers who were the most dangerous road-users that we encountered. All of us at one point or another got cut up and had to gesticulate angrily, which they completely ignored. The final 5 miles were hell as road after road was closed and we were all exhausted and grouchy. Even the arrival at the Eiffel Tower was an anti-climax because I was so done with the whole experience.

Giant grumpy face at the Eiffel Tower

After the obligatory photos at the Eiffel Tower with plastered on fake smiles, we had to cycle another 6 miles back across Paris to drop our bikes off at the Eurostar luggage office at Gare du Nord. About 2 hours after reaching the Eiffel Tower we eventually reached the hotel where it started to sink in, with the help of some beer.

Job done

Job done

The next day we’d planned to take it easy and mainly sit in coffee shops eating cake but we ended up walking miles across Paris in the blazing sunshine because it would have been a shame to miss out on the weather and not make the most of being in Paris. The Eurostar home was a very quiet affair with baguettes, snoozing and quiet contemplation of what we’d achieved.

Feeling every bit the warrior

Watch out next week for a post containing all of the details of trip, including which hotels we stayed in, where we ate and the actual routes that we took as well as some tips and lessons for anyone else thinking of doing the same ride.


HOW I’LL BE FUELLING MY CYCLE FROM LONDON TO PARIS

One of the trickiest parts to get my head round while training to cycle from London to Paris has been the nutrition. I’m not naturally an endurance athlete so I’ve never had to experiment really with fuelling whilst moving. Even during the triathlons I’ve done I got away with a couple of badly-timed gels and powered through on sheer willpower. You can’t quite do that for 7 hours on a bike when there’s an awful lot of hills to climb.

The first few training rides I under-fuelled, leaving my legs completely empty and leaving me feeling really rotten by the end of the ride. Following that I made a real effort to fuel properly during training, starting after one hour and making sure I eat something every hour after that. I would estimate that during training I’ve been getting in 20-30g of carbohydrate per hour in the form of energy gels, carbohydrate powder in my water bottles and ‘real’ food like granola bars and Soreen banana bread loaf.

Having spoken to a specialist from Science In sport at a recent cycling event, I’m now thinking that 20-30g per hour isn’t quite enough. Apparently we should be taking in around 60g of carbohydrates per hour to stay fully fuelled. That’s the equivalent of three gels! My stomach does not agree with a high volume of processed sugar like gels or energy blocks so I’ll be trying to keep these to a minimum.

Here is my ideal plan for nutrition each day:

Breakfast (two hours before we get on the bikes) – high GI foods including cereal, fruit, juice and bagels. I’ll also be getting in some sort of French pastry each day because it would be rude not to.

Every hour on the bike – one Science In Sport energy gel/Clif Blok or one bar of real food + one serving of Tailwind soluble carbohydrate powder with electrolytes in 500-800ml of water. I’ll also have the emergency fizzy cola bottles to hand for a mental and physical boost before hills.

Post-ride – dinner with a focus on carbs and protein keeping fats and fibre to a minimum for obvious reasons, no one needs to be caught short on the side of a French road. Keep drinking soluble electrolytes and carbohydrates throughout the evening to carb load and rehydrate before the next day.


I’ll also be carb-loading for 2 days before we leave to try and fill my muscles with readily-available energy. This will come in the form of high-GI foods again like rice, pasta, potatoes, cereal and bread.

For hydration I’ll be aiming for at least 3 litres of water each day, half of which will have Tailwind soluble electrolytes and carbohydrates in, the other half will be have Nuun electrolytes tablets* in. I get very thirsty when I’m cycling and on one particularly hot training ride I got through 5 litres of water. In hindsight it was potentially a bit too much as for the next few days I felt awful.


Have you got any tips for long-distance nutrition?


*I was provided with the Nuun electrolyte tablets for free

KIT LIST: WHAT I’M TAKING TO CYCLE FROM LONDON TO PARIS

The one conversation that Elle, Mollie and I have had the most throughout this whole training period is what kit we’ll be taking with us. Yes, we all wear a lot of lycra anyway but none of us have done a multi-day cycle trip before so it’s taken a while to settle on this final kit list. Settle in, it’s a long one…

First off, what am I actually going to wear? Well, if I’m honest, as little as possible. I’m a sweaty person anyway and cycling up hills makes me sweat probably more than any other form of exercise. Therefore, my outfit of choice each day will be a pair of bib shorts and a sports bra so I can stay as breezy as possible.

DHB Bib shorts

I prefer bib shorts to regular shorts because there’s no pesky waist band digging in but the problem comes when you need to go to the loo because everything has to come off, including your jersey, so you can get the straps down. The DHB bib shorts are a halterneck design which means that with a bit of flexibility you don’t actually have to remove your jersey to go to the loo. For a lazy person like me that’s the dream. However, the chamois (the pad that goes between your legs and saves your lady garden), isn’t as padded as I would like so I’ll probably be saving these for the first or second day while I’m still fresh.

Decathlon B’TWIN bib shorts *

These are my favourite piece of kit because not only do they look cool but the chamois is perfectly padded and the bib part of the shorts provides a little bit more coverage and therefore protection from the sun if you’re not wearing a jersey. If these came in a halter neck bib like the DHB ones they’d by a 10/10, as it is they’re a 9.5/10.

Decathlon B’TWIN sleeveless jersey *

As I said, I’m not a fan of wearing too many clothes when it’s hot and I’m exercising so I was on the lookout for a sleeveless jersey (also, optimal tanning opportunity). This one from B’TWIN is super thin with the standard pockets in the back including a zipped pocket. The only issue is that it rides up because I have quite a high waist. I’m sure if I went up a size to a large I wouldn’t have the same issue.

Decathlon B’TWIN rainproof jacket *

I’ve got everything crossed that we don’t meet any rain but you never know! This jacket is so light and will fold up into nothing so it’s the perfect ‘just in case’ jacket.

Altura Peloton jersey *

I love the brightness of this jersey and when you’re wearing it it’s light, soft and comfortable. Again, the pockets are great with a zipped one for essentials and it stays down over my waist, which is a bonus.

Shock Absorber sports bra *

Being on the smaller-side up top I’ve never really bothered with a proper sports bra before, just picking up crop top style bras that I like the print of. This shock absorber bra has a zip-up the front which is a godsend when you’re sweaty and tired, no more struggling out of a sweaty bra! It fits really well (I’m a 36C), cradles my boobs well and looks great too.

Nike Indy sports bra

This is the kind of sports bra that I normally wear as it’s non-padded, non-underwired and doesn’t get in the way of anything. It’s comfortable enough to wear all day and will dry overnight if I want to wash it.

1000 Mile Breeze Lite socks *

I’ve never paid much attention to socks when cycling but I’ve realized that on the longer rides, you need something comfortable that will prevent blisters and keep the swat wicking away from your feet. These double-layered socks, whilst designed for running, do a great job and have really looked after my feet on some of the longer training rides.

Shimano WM64 SPD shoes

I have a love-hate relationship with these clip-in shoes. In training I’ve fallen off my bike because of them three times, each time because I’ve been going so slow that when I go to stop I can’t get my foot out in time before I start to topple over. The falls aren’t spectacular but they are embarrassing. On the plus side they’re helping me work on my hill climbing technique by teaching me the pedaling movement of wiping gum off the bottom of your shoe, rather than just pushing down all the time.

Decathlon B’TWIN 500 road cycling helmet *

The ideal scenario with a bike helmet is that it’s light enough and fits well enough that you aren’t aware of it. I’ve found that in the BTWIN helmet. Worn with a cycling cap underneath to pick up al the sweat it’s perfect.

Now, what about all the other stuff? Well, luggage-wise I’m just going to take my old Berghaus rucksack that was a hand-me-down from my husband because on our final day in Paris I want something that’s easy to carry around. For the cycling days it’s going to be strapped onto my pannier rack using a variety of bungee cords. I have a little bag under my saddle for spare inner tubes and my allan keys.

Science in Sport water bottles

I’ll have two of these on my bike and they carry 800ml each which is perfect for me. I tend to get through a lot of liquid on the bike so I need as much as possible with me. I’ll refill these as and when I can. I’ll also be taking a BRITA fill&go bottle * for the evenings as it makes any water taste deliciously filtered.

Restrap handlebar bag

As my main bag won’t be that accessible while I’m riding I’ve also opted for a small handlebar bag to contain the essentials. I’ll be keeping bits of food and my phone charger in there so it’s all to hand. The design of this one is really smart and it’s also fully waterproof with an inner sealable pocket. Hopefully I won’t need to test that feature out.

Quadlock phone holder *

I’m forever getting lost when cycling round London so the idea of cycling to Paris without a sat nav was slightly nerve-wracking. The Quadlock holder simply straps on to your handlebars with a couple of bands, you put the case onto your phone and the two click together. Simple! It’s been really useful to navigate around London, check the time and see what my husband is thinking for dinner. While we’ll be mostly navigating to Paris using a Garmin bike computer, my phone in the Quadlock will be a good back up.


As well as all the stuff above I’ll also be carrying underwear (although not for when I’m actually cycling because the girls have taught me that cycling commando is 100% the way to go), spare socks and the bare minimum of toiletries including a toothbrush, mini toothpaste, face moisturizer, and nurofen. I’m also packing a pair of 3/4 length leggings and a t-shirt for the evenings and our day in Paris as well as a t-shirt to sleep in because the girls don’t need to see the girls. I’m keeping tech to a minimum and will only be taking my phone along with a portable charger and a plug in charger for overnight. Unfortunately my proper camera is just too heavy and bulky to take.

Last, and possibly most importantly, I’ll be taking Ride suncream *, the ultra water-proof and sweat-proof suncream that will last a lot longer than a conventional one. I’ve tried this out on training rides and it really does stay on all day and protect from sunburn! Just don’t do what I did one ride and forget to put any on at all… That hurt. A lot.

That’s about it for kit so well done for reading this far! I’ve got a separate post on how I’m planning on fuelling the ride, which will be up in the next couple of days.

If you want to follow our trip you can check out my Instagram where I should be posting on Stories fairly regularly from the road.


All items marked with a * were provided for free in return for a review, thank you to all of the brands for supporting us on this amazing trip


HOW I LEARNT TO SWIM HAPPY

Last week was my final session of one-on-one swimming lessons with Swimming Nature and I’m so sad it’s over! You can read all about my first lesson here.

I went into these sessions knowing that I’m a fairly confident swimmer and I’m very comfortable in the water so I was excited to work on my technique and have my first swimming lessons as an adult.

IMG_9818

In my second lesson we worked further on my front crawl technique by trying to slow down my arms, the result of which is that I felt a lot less panicked when swimming front crawl. I’ve mentioned before that I felt I could swim breakstroke for hours and now my front crawl is approaching the same calmness and sustainability as breastroke. Mark also tweaked my breasktroke technique, encouraging me to look at Adam Peaty’s body position in the water to find a more streamlined way of moving. The best part of that session was learning how to tumble turn properly! I’ve only ever done them on my own before as a kid so it was great to be taught the proper technique using Fergus the toy monkey (not as weird as that sounds, trust me).

IMG_9805

In the third session we continued working on my arm position for front crawl to get the coveted ‘high elbow’ which creates an efficient and beautiful stroke. I’m not sure I felt so beautiful as I swam but I could definitely feel the advantage in the efficiency. We tested it by timing the tempo of my stroke (2.6 seconds per cycle) and then playing with the speed of the length by just adjusting the technique and body position. My front crawl length time dropped from 21 seconds down to 16 seconds, a huge difference!

My final session was focused on learning the butterfly stroke, something that I’ve never been taught before. Mark broke it down to its parts before we put it all together and suddenly it didn’t seem quite so scary or difficult. My butterfly certainly needs a lot of work but the basics are there. We finished off by swimming a medley, one length each of butterfly, back stroke, breastroke and front crawl. I finished on a massive high feeling really proud with how much I’ve learned and how much happier I feel in my front crawl.

IMG_9819

I would highly recommend Swimming Nature and specifically Mark at Fitness First Highbury for the simple teaching methods, confidence-boosting feedback and in-water demonstrations that I haven’t seen other places offering. The focus with Swimming Nature is learning how to swim beautifully and while I’m not sure my strokes are beautiful quite yet, I definitely feel happy doing them. I came away from each session feeling positive and full of energy and if there’s one suggestion I’d make, it’s that if you book a session, splash out (sorry) for the full 60 minute session. 30 minutes flies by too quickly and I was left wanting more each time.

Prices for the 60 minute one-on-one sessions are £64 which is on a par with personal training sessions, essentially what you’re getting but just in the water!

You can find out more info on Swimming Nature and book sessions here

#3PTsToParis - Training Update

Remember when I said that I was going to cycle from London to Paris? Well it’s now only 4.5 weeks ago and it’s all getting a bit real.

This is what happens when you let Google Maps take you down ‘cycle paths’

We’ve written up our kit lists, we’ve received some amazing kit to train in and for the trip (more on that in another post before we leave) and we’ve been getting out on the bikes as much as possible. So how’s that all been going?

Here are some stats and things I’ve learnt from training so far:

  • Well over 245 miles clocked up so far
  • 5 long rides
  • Countless mini rides (less than 5 miles each)
  • 3 MyProtein blackcurrant gels swallowed
  • 1 portion of fish and chips on Southend Pier
  • 2.5 cans of diet coke
  • 0 punctures (I know, I’ve just jinxed it)
  • 54 billion hills (accurate stat, honest)
  • 1 stolen bike
  • 1 new bike
  • My uphill technique needs work. My downhill technique needs to be given a sense of mortality and I need to use my brakes more often
  • All food tastes better after 4 hours in the saddle
  • I need to fuel better and more often so I don’t bonk (hit the wall)
  • The foam roller is my quads’ best friend
  • Long-distance cycling creates exhaustion like nothing else I’ve ever experienced
  • Cycling tan lines are ridiculous and suncream must be worn even if it’s not sunny
Post fish and chips feast in Southend

Post fish and chips feast in Southend

The plan for the next 4 weeks is 3 more long rides including one to Brighton and another one to Southend. The midweek rides will also be upped that I’m riding on consecutive days to get my legs used to working a few days in a row. I’ll also be experimenting a bit more with my fuelling and trying to get food in more often to keep my energy up.

Do you have any tips on fuelling for endurance challenges where you’re working out for 6+ hours at a time?


SOPHIE LEARNS TO SWIM

I’ve spoken on my blog before about how much I love being in the water but I know that my technique needs a bit of love, as is evident when I get to the end of a few lengths of front crawl and I feel like I’ve run a marathon. So when Swimming Nature got in touch to ask if I wanted to try out a series of 4 swimming lessons with them I jumped at the chance.

Swimming Nature set themselves apart because the classes are small, either one-on-one or two pupils to one instructor and the instructor is often in the pool with the pupils helping them through the lesson. They teach kids how to swim without any doggy paddle or arm bands which is amazing. I turned up early for my first lesson and saw this in action. I couldn’t help but smile as tiny kids were learning how to do tumble turns and swim backstroke whilst being supported in the water by fun and energetic coaches.

When it was my turn thankfully the lane emptied and it was just me and Mark, my instructor. He asked me a bit about my swimming history which includes a few triathlons with very slow swimming legs. I then showed him what I could do in the water with a few lengths of each stroke. I was very flattered when he asked if I’d swum breastroke for a club in the past but it did confirm what I suspected, I feel like I can swim breastroke for hours because my technique happens to be efficient and strong. No idea how that happened as I haven’t had any lessons since I was a kid!

My freestyle, or front crawl, on the other hand needed a bit of love. Mark videoed me while I was swimming which was fascinating to watch because the struggles that I feel while doing freestyle showed up clearly on the video.

My style is very flat in that there’s not much rotation of my body as I use each arm. Whilst some swimmer sod have more of a flat shape in the water it’s generally suggested that you’re more aerodynamic (hydrodynamic maybe?) if your whole body turns as your arms move. It’s tricky to explain in words but I’m hoping that by the end of my course of lessons I’ll be able to do a comparison video.

We mainly worked on breathing to get me more used to taking breaths on my non-dominant side, something I can do but prefer not to as the other side is stronger. Like anything, the more I thought about it and focused on what Mark was telling me at the end of each length, the smoother my stroke felt. It’s amazing how much more focused I was on what each part of my body was doing within 30 minutes.

I came out of the pool with my mind buzzing and instructions to try and practice before my next lesson although I’m not sure that’s actually going to happen between work, training to cycle to Paris and life. I’ve booked some swimming sessions into my diary already for the coming weeks though so hopefully I’ll be able to practice a bit more after the other lessons.

I can’t wait for the next lesson already!

CLIMBING WITH EVERYONE ACTIVE

Does anyone else get the desire to scamper up and over things like walls, rocks and urban climbing frames? Excellent, it’s not just me. Everyone Active recently got in touch with me to see if I wanted to try out their climbing wall at the Seymour Leisure Centre in Marylebone, London and of course I jumped at the chance.

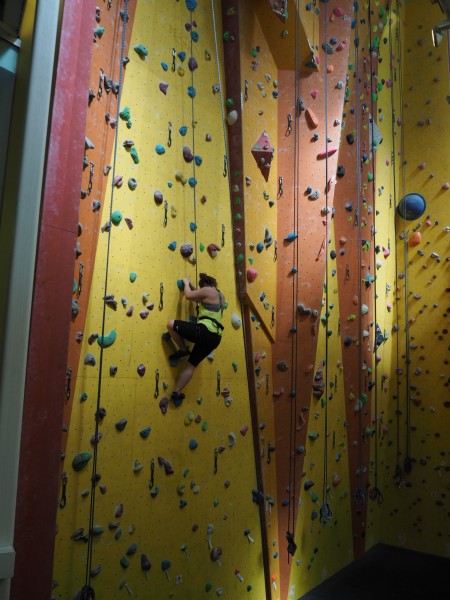
I did a bit of bouldering at university but I’ve never really climbed properly so I was excited to learn a bit more about the technical side of it and challenge myself. The leisure centre itself is huge with a swimming pool, massive sports hall and lots of other studios but the climbing wall itself stretches up about 4 or 5 storeys with enough space for 10 or more people to be climbing at once. The hand and foot-holds can be changed so if you go regularly you’d see the routes change.

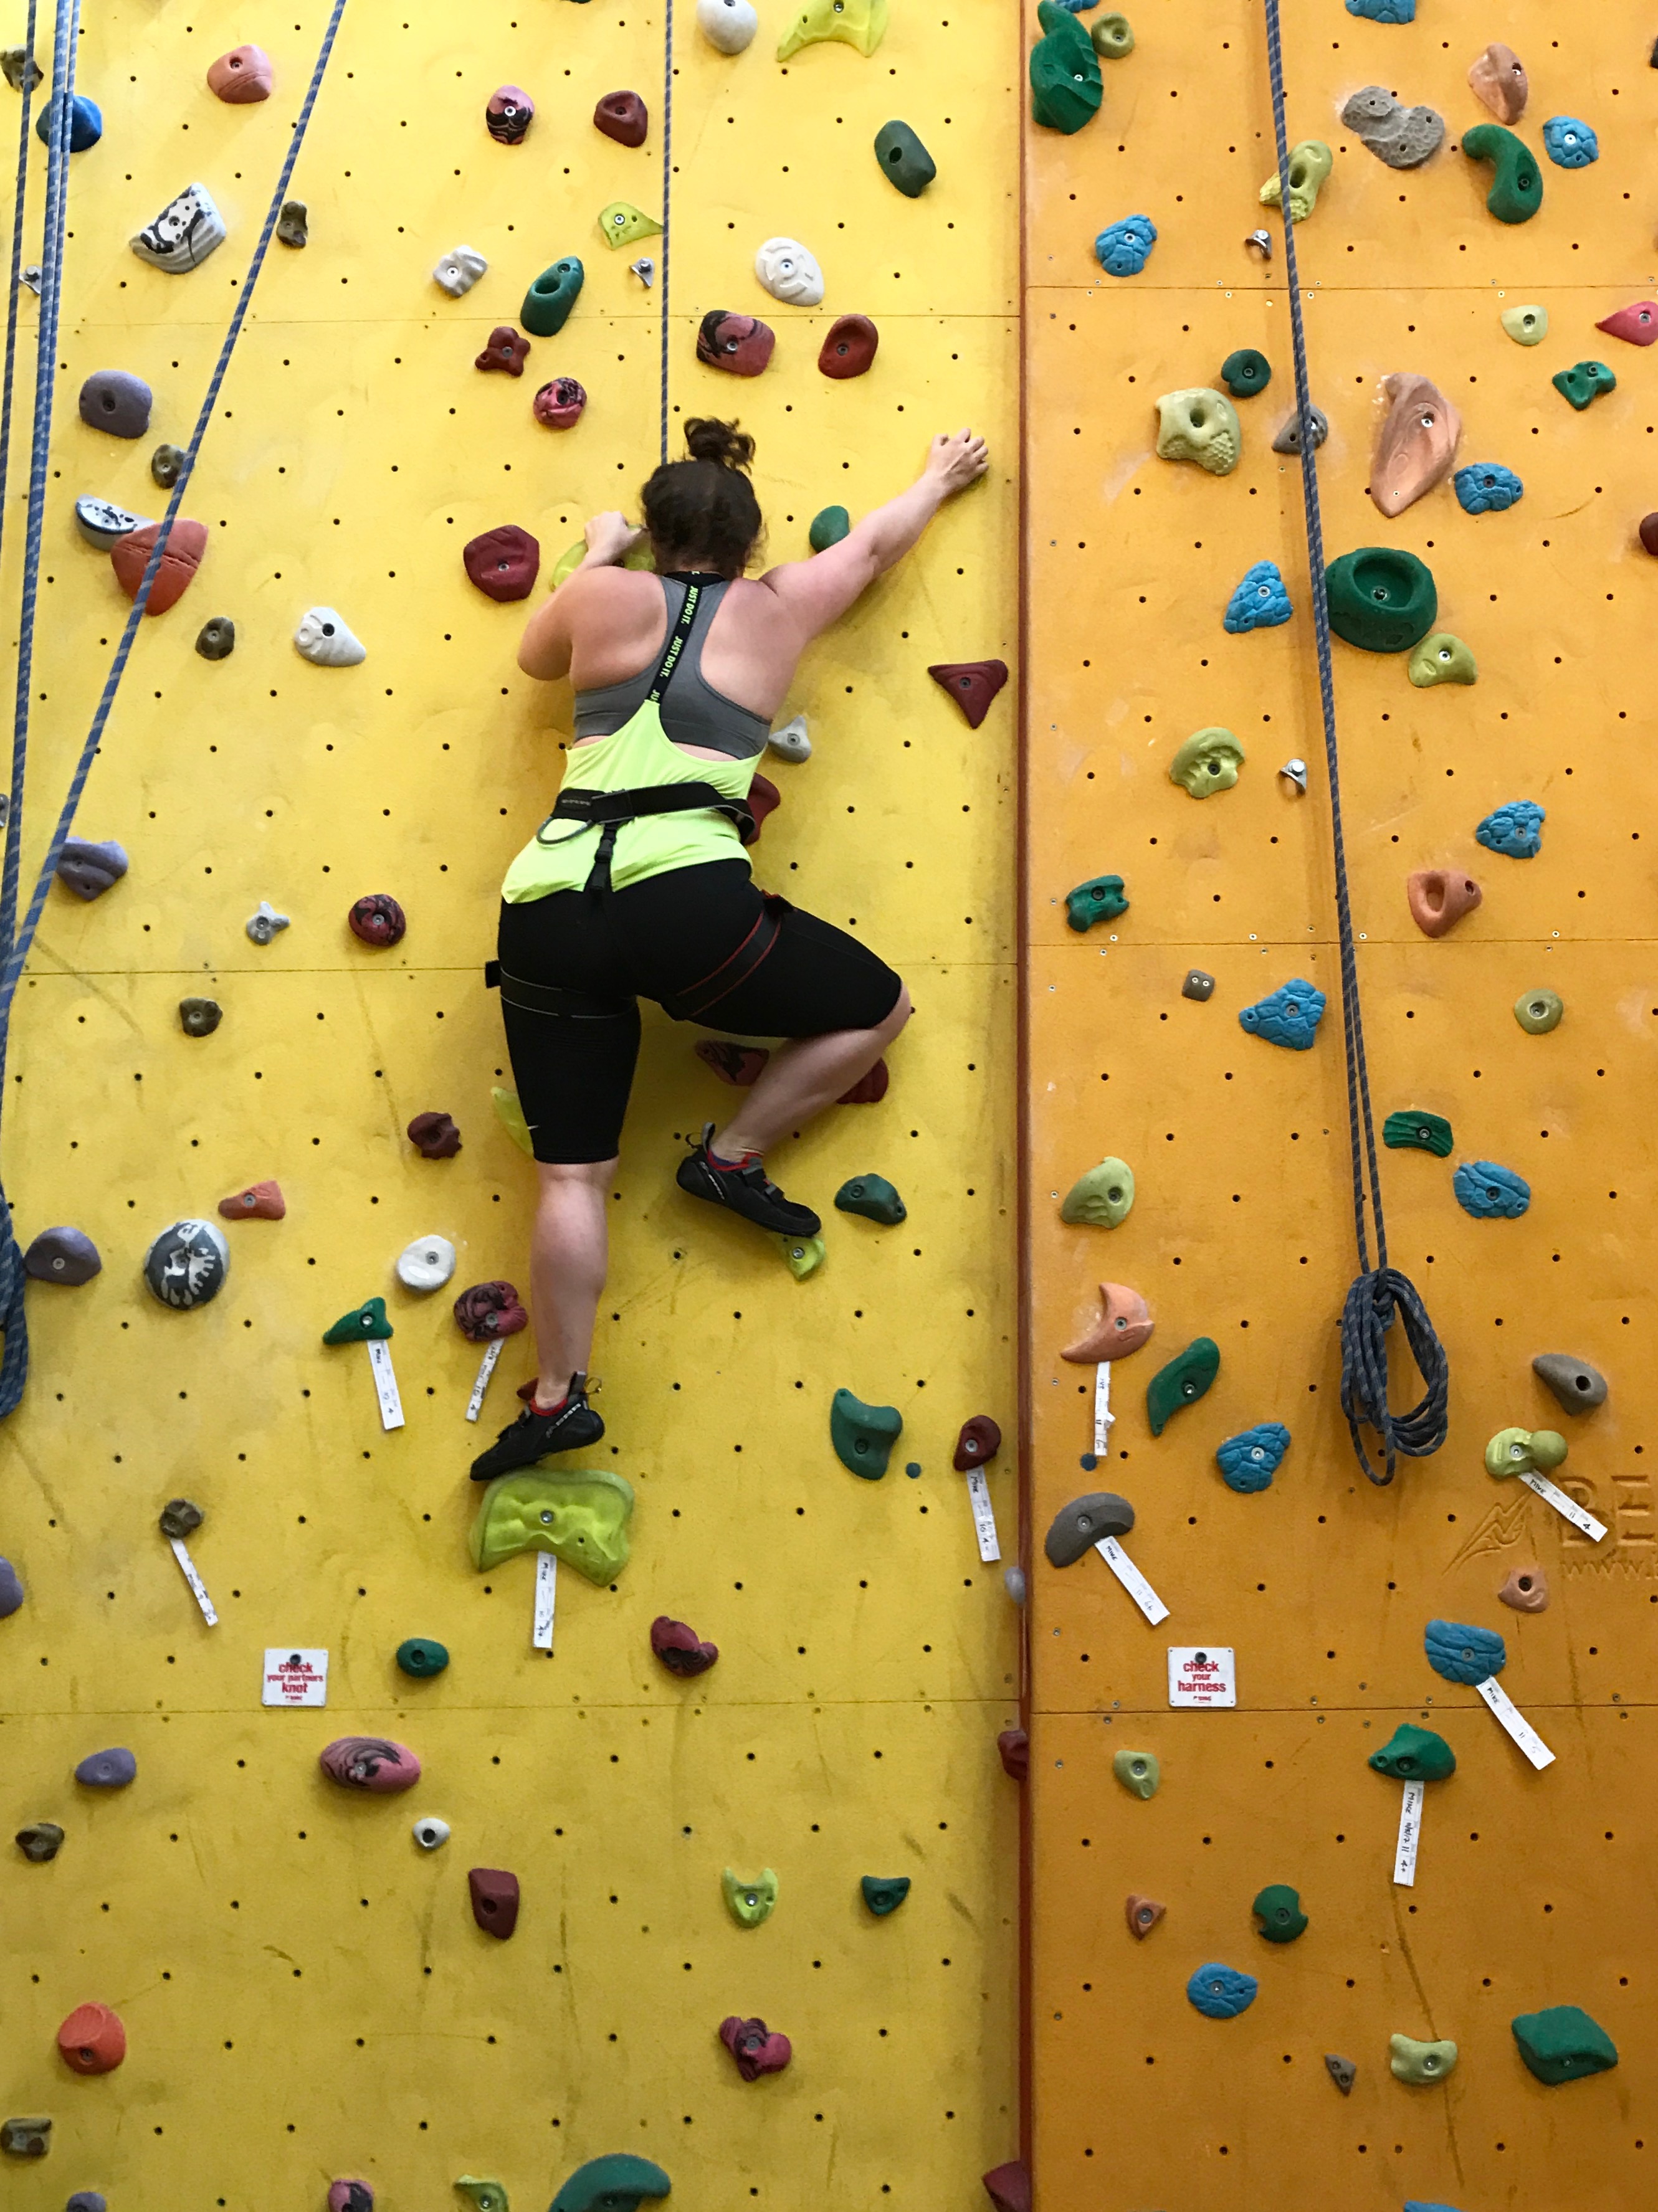
After a quick introduction to safety, the harness and how to tie a knot for belaying I was presented with the beginners wall and a challenge to only use the red blocks. Up I clambered, feeling that sense of achievement as I hit the top and abseiled back down. Next up was a slightly more tricky route where a couple of times I had to match my feet or hands (put them onto the same hold) which doesn’t feel as stable but enables you to then move up.

On this route I started to feel my arms getting tired but a well-timed reminder to use my legs to push myself up rather than using my arms to pull myself up helped to keep me going to the top. The third route went all the way to the top of the wall and was much more technical including a few lateral moves and some more feet and hands matching. This is the one that gave me a massive buzz as I started struggling towards the top and only realised how high I’d climbed when I reached the very top and looked down. Top tip: don’t look down.

The final challenge was to try out bridging where you climb up a corner rather than a straight wall. In a bridge you’ll regularly find positions for your legs where you’re so stable that you can actually take your hands off the wall and give your arms a break. That’s the idea anyway. I made it halfway up this route before my leg started cramping and I was done for the lesson.

Overall the lesson was a lot of fun, the instructor was incredibly helpful with pointing out which holds to look at for each hand and foot when I got stuck and the facility was quiet, clean and well-maintained. My grip strength was pretty smoked after the session which made applying the brakes on my cycle home a little bit interesting…

If you want to try something new to challenge your body in a new way I’d definitely recommend climbing. It engages your brain to the point that you forget you’re working out and it’s a great upper-body workout. There’s a sense of achievement too every time you reach the top of a route so that post-workout endorphin boost is even bigger.


Details

Seymour Leisure Centre (Seymour Place, London, W1H 5TJ)

Price list here

Equipment is available to hire

3 PT’S TO PARIS

You know when you make a decision because you get over-excited and then sit back and think ‘oops’? Well yeah, I’ve done that. Except that oops isn’t a misjudged outfit or one drink too many, it’s a cycle trip to Paris. From London. On a bike. Without a support vehicle.

Together with Elle, Mollie (both also personal trainers - hence 3 PTs to Paris) and a few others I’m taking on a challenge that I’ll be using to celebrate my 30th birthday as we’ll arrive back in London about 3 hours before I hit the big 3-0. After succumbing to a back injury a couple of months ago I’ve found that cycling is one of the few forms of exercise that doesn’t stress out my back muscles. The triathlon I had in mind for the end of July is out of the picture because with the injury I just haven’t been able to train for it. So Paris it is!

(L-R) Mollie, Elle & Me

We’ll be doing the 164 (or so) miles over 3 days, leaving London on Friday morning and arriving at the Eiffel Tower on Sunday afternoon. The first day will see us cycling to Newhaven which is just to the east of Brighton to cover about 56 miles. A ferry will then deliver us in Dieppe late Friday night where we’ll stay in a little hotel. On Saturday we’ll tackle our longest day of 62 miles from Dieppe to Beauvais and then cover an easy 45 miles from Beauvais to Paris on the Sunday.

London2Paris map

In panniers we’ll be carrying all of our kit and tools but hopefully in mid-July the weather should be good enough that we can get away with minimal clothes! The biggest dilemma at the moment is how to fit in additional shoes so we don’t have to walk around Paris on the Monday in our cycling shoes. Important stuff.

The plan for training is to complete 2 x 1 hour cycle sessions during the week followed by a 2-4 hour cycle at the weekend. I’ll also be doing plenty of foam-rolling and some yoga to help my tight hips and quads and I’ll hopefully be continuing my weekly PT sessions to maintain some strength. Training started well last weekend with a 20 mile cycle swiftly followed by my beloved bike being stolen from inside my apartment block. Yep, they sawed through the bannisters to get it out. As gutting as that was the challenge is getting closer so I had to dig deep and shell out for a new bike which is a beauty.

Keep an eye out for more blogs in the 3 PTs to Paris series to cover how training is going and what kit we’ll be taking with us.

GETTING A BIKE FIT

I’m coming up to the big 3-0 this year and while I thought that the Olympic distance at the London Triathlon was going to be my celebration it hasn’t quite turned out like that. With a sore back and having to take everything back to basics I think trying to get round an Olympic distance tri is going to be out of reach this year unfortunately.

Luckily the opportunity for a different kind of challenge has appeared, one which I’m very excited about, and one which requires many hours in the bike saddle. Ever since I got my road bike a few years ago I’ve had a few niggles when riding long distances so what better time is there than now to get my bike fitted?

I found Foundation online after struggling to find a bike fitter in London. It seems that they’re in short supply and the other ones that are out there are either extortionately expensive and/or designed for pro-cyclists. Wei from Foundation will also come to wherever you are so you don’t have to trek across London with your bike.

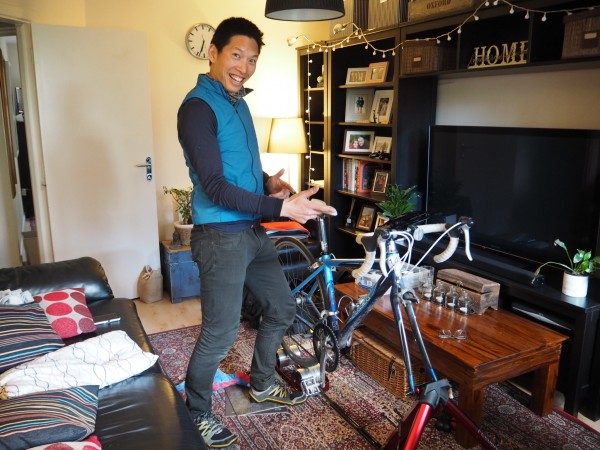
After chatting on the phone and filling out an extensive pre-fit questionnaire Wei turned up on his bike with a huge bag of kit including a turbo and plenty of tools and spare parts. You don’t need a huge amount of space which is lucky as I live in a one-bedroom flat, just enough space to set up a turbo and to set up a few monitoring tools.

Very quickly Wei set up the turbo and got my bike ready to go by taking photos of the current set up and checking that everything was aligned correctly. Before jumping on the bike he had a look at my body mechanics, searching for any asymmetry and to see how my body moved. Apart from a very slight discrepancy between the length of my legs everything seemed to be pretty even which was a good start.

My new clip-in shoes were next for scrutiny. It turned out that I hadn’t done such a bad job setting them up (despite having no clue what I was doing) and they just needed a slight adjustment to make sure the cleats were in the right place so I could recruit equal power from my quads and hamstrings.

Once I was on the bike we started with the height of the saddle which apparently is most often the thing that people get wrong. Wei adjusted the saddle a few millimetres at a time going up and down from where it was and getting me to cycle fast at each height. It was amazing how much difference a few millimetres could make until I hit the sweet spot and the power through each pedal felt even and the whole pedal stroke felt smooth. Wei also tested my balance by asking me to come down into what was essentially a squat position (which is where we should be on a bike) and taking my hands off the bars but staying in the same position. If the saddle is correct then that position should be easy to hold without needing to shift in the saddle. We ended up with the saddle a few millimetres higher than where it had been.

The next was the handlebars and we played around with the distance between the saddle and bars as well as the height and angle of them. I’d been getting pain through my right shoulder on longer rides which looked like it was from the angle of the handlebars being wrong and the saddle being too low. We tilted the handlebars up a bit so I wasn’t reaching down for them and suddenly the pressure that I’d been feeling through my wrists disappeared. Wei fitted a new stem for my handlebars as the one I had on there wasn’t so adjustable and with a few more tests to double-check that everything was correct the fit was done!

Overall it took about 3 hours and it was so thorough and measured that I feel confident that this is now going to be the most comfortable bike I’ve ever had. Wei knows his stuff and is very good at explaining everything which is important for me. I like to learn about things as I go! He’s a triathlon coach and used to run cycle tours as well as working as a bike mechanic so you’re definitely in good hands. The hardest part about it was getting used to the feeling of riding on a turbo which I’ve never done before.

As a follow up I received a file containing all the pre-fit photos in case I wanted to revert to any settings and a spreadsheet containing all of the new measurements. All fits come with a follow-up session within 6 months to check the fit and see if any more adjustments are needed.

I’ve done a couple of short cycles with the new fit and the bike feels great. This weekend will be the first longer test so keep an eye on my Instagram to see how it goes.


WHAT HAPPENED WHEN I DRANK 2 LITRES OF WATER EVERY DAY

I’m a self-confessed hydraphobe (if that’s a real word…). As a kid, teenager and young adult I struggled to drink plain water and all I’d drink was juice or squash. A lot of squash.

Since getting back into fitness a few years ago I’ve trained myself to drink plain water because I know how much my body needed it. I started by using less squash and then switching to fresh fruit and mint until eventually plain water didn’t taste too bad.

Still, I struggled to drink more than about a litre each day because I wasn’t in the habit, even when I permanently had a water bottle on my desk. Over the last month I’ve not been able to exercise like I used to because of a low-key back injury so I’ve been making sure that my nutrition is on point to keep me feeling my best. Part of that has been my water consumption and I’ve been drinking at least 2 litres of water every day, sometimes more.

So, how have I felt?

Well, the first thing I noticed is that I’m peeing a whole lot more, at least every hour, maybe more. It’s fine when I’m at home but there’s been a few times where I’ve been out walking the dog and had to hotfoot it to the nearest cafe or pub. I thought my body might get used to it but so far it hasn’t and I live in fear of getting caught out and having to have a wild wee.

The second is that I’ve found it much easier to exercise self-control when it comes to how I eat because I feel full most of the time. If I feel hungry I try and have a drink to see if I’m actually just thirsty. Sometimes I am but if not then I eat something! I’ve also managed to go through my period without cramming all the sugar I can find into my face and the only thing I can pin it down to is my increased water consumption.

Thirdly, I got off a very late flight a couple of weeks ago after drinking close to 3 litres of water during the day. Having napped on the plane I would normally expect to walk off with my eyes stuck together, a dry mouth and feeling like death. This time however my eyes felt fresh, my skin didn’t feel dry and I felt awake and full of energy. Again, the water consumption was the only difference to other late flights I’d taken.

The last benefit I’ve noticed is that I feel like I have more energy overall. I’m not getting a mid-afternoon slump and I’m more focused when I sit down in front of my computer. I often struggle with getting distracted when I’m working but my brain seems to be more able to focus on one thing at a time.

Here are my top tips for increasing your water consumption, all of which have helped me!

1) If you don’t like the taste of water use fruit or herbs (lime & mint is my fave combo) to freshen up the taste

2) Keep a refillable water bottle on you at all times and as soon as it’s empty refill it

3) If you work at a desk keep the water bottle in clear view and every time your eyes settle on it have a drink

4) Don’t just sip at it, gulp a load down each time. You’ll soon find that if you do this then you might be able to drain a litre in 4-5 goes

5) If you’re in a restaurant always ask for tap water alongside any other drink you order and drain a couple of glasses before you start on your other drink

6) If someone offers you a drink while you wait for an appointment, ask for water and drink it there and then

7) Treat yourself to a water bottle that you like to drink out of and looks good. For example, I find it hard to gulp water from a standard water bottle. I prefer bottles with a cap or inbuilt straw so that’s what I always look for when I need a new one

What are your top tips on how to drink more water?